# Getting Started with ReactFire
⚛ + 🔥 = 🌯
This quickstart shows you how to connect your React web app to **Cloud Firestore**, listen for its data, and display the data in _real time_. We'll also configure **Firebase Performance Monitoring** so you can get some performance stats.
Let's build a web app that displays, in _real time_, the tastiness of a burrito. Yum!
To see the completed app, check out [this StackBlitz workspace](https://stackblitz.com/fork/reactfire-sample).
## 1. Create a document in Cloud Firestore
> If your project doesn't have a Cloud Firestore database instance yet, check out [these instructions](https://firebase.google.com/docs/firestore/quickstart#create) to create a new instance. Please initialize it in _locked mode_.
1. Go to the _Database_ tab in the [Firebase console](https://console.firebase.google.com).
1. Add a document.
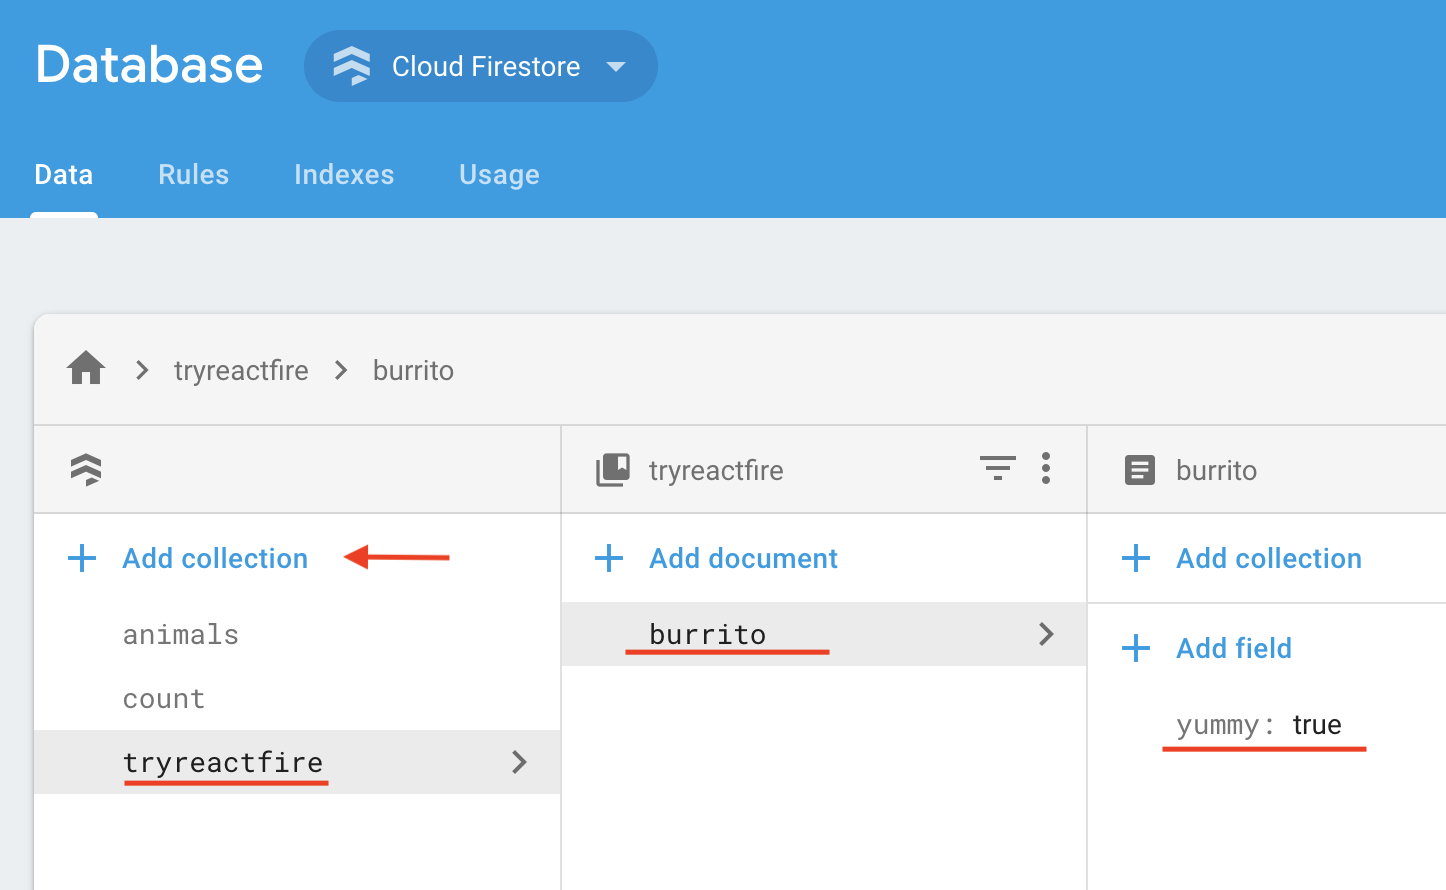
1. In the _Data_ tab of the console, click _Add Collection_
1. Name the collection **_tryreactfire_**
1. Add a document with ID **_burrito_** and boolean field `yummy: true`
1. Add security rules to your document.
1. In the _Rules_ tab of the console, add the following security rules:
```text
rules_version = '2';
service cloud.firestore {
match /databases/{database}/documents {
match /tryreactfire/burrito {
allow read, write: if true;
}
}
}
```
2. _Publish_ the rules.
## 2. Create a React App
> Prerequisite: make sure you have [Node.js](https://nodejs.org/en/) installed.
In a terminal, create a fresh React app in a directory of your choice.
```shell
npx create-react-app myapp
cd myapp
```
## 3. Install ReactFire and the Firebase SDK
> Ignore yarn/npm warnings.
```bash
yarn add firebase reactfire
# or
npm install --save firebase reactfire
```
## 4. Register your app with Firebase
1. In the center of the Firebase console's project overview page, click the Web icon to launch the setup workflow.
> If you've already added an app to your Firebase project, click _Add app_ to display the platform options.
1. Enter your app's nickname.
> Note: Firebase Hosting is not required for you to use Firebase products with your web app.
1. _Register_ the app.
1. Copy the Firebase configuration. This will be used in Step 4.
1. _Continue to Console_
## 5. Add Firebase to `index.js`
> Open the src directory and add code to index.js as described below.
1. Import from ReactFire
```js
//...
import { FirebaseAppProvider } from 'reactfire';
//...
```
1. Add the Firebase configuration
> Add the firebaseConfig constant and paste the configuration from Step 3.
```jsx
//...
const firebaseConfig = {
/* Paste your config object from Firebase console here */
};
//...
```
1. Wrap your app in a `FirebaseAppProvider`
> Replace the default render function.
```jsx
//...
ReactDOM.createRoot(document.getElementById('root')).render(
);
//...
```
## 6. Add the Burrito() function component to `App.js`
> Open the src directory and add code to App.js as described below.
1. Import from ReactFire
```js
//...
import { useFirestoreDocData, useFirestore, SuspenseWithPerf} from 'reactfire';
//...
```
1. Add a function component
```jsx
//...
function Burrito() {
// lazy load the Firestore SDK and create a document reference
const burritoRef = useFirestore()
.collection('tryreactfire')
.doc('burrito');
// subscribe to the doc. just one line!
const burrito = useFirestoreDocData(burritoRef);
// get the value from the doc
const isYummy = burrito.yummy;
return The burrito is {isYummy ? 'good' : 'bad'}
;
}
//...
```
1. Render your component inside of a `Suspense` tag
> We need to do this because `useFirestoreDocData` throws a Promise while it is waiting for a response from Firestore. Suspense will catch the Promise and render `fallback` until the Promise is resolved.
Replace the `App` function with the following:
```jsx
//...
function App() {
return (
{/*
SuspenseWithPerf behaves the same as Suspense,
but also automatically measures load times with the User Timing API
and reports it to Firebase Performance Monitoring
*/}
);
}
//...
```
## 7. Run your app!
1. Run your app.
```bash
yarn start
# or
npm run start
```
1. Edit the value of `yummy` in the _Database_ tab in the [Firebase console](https://console.firebase.google.com) and watch it update in real time in your app! 🔥🔥🔥
## _About Firebase Performance Monitoring_
`SuspenseWithPerf` will lazy load the Firebase Performance Monitoring library and report on on our custom trace, `load-burrito-status`, that we set in the `traceId` prop of `SuspenseWithPerf`. In addition, it will automatically measure [common performance stats](https://firebase.google.com/docs/perf-mon/automatic-web)!
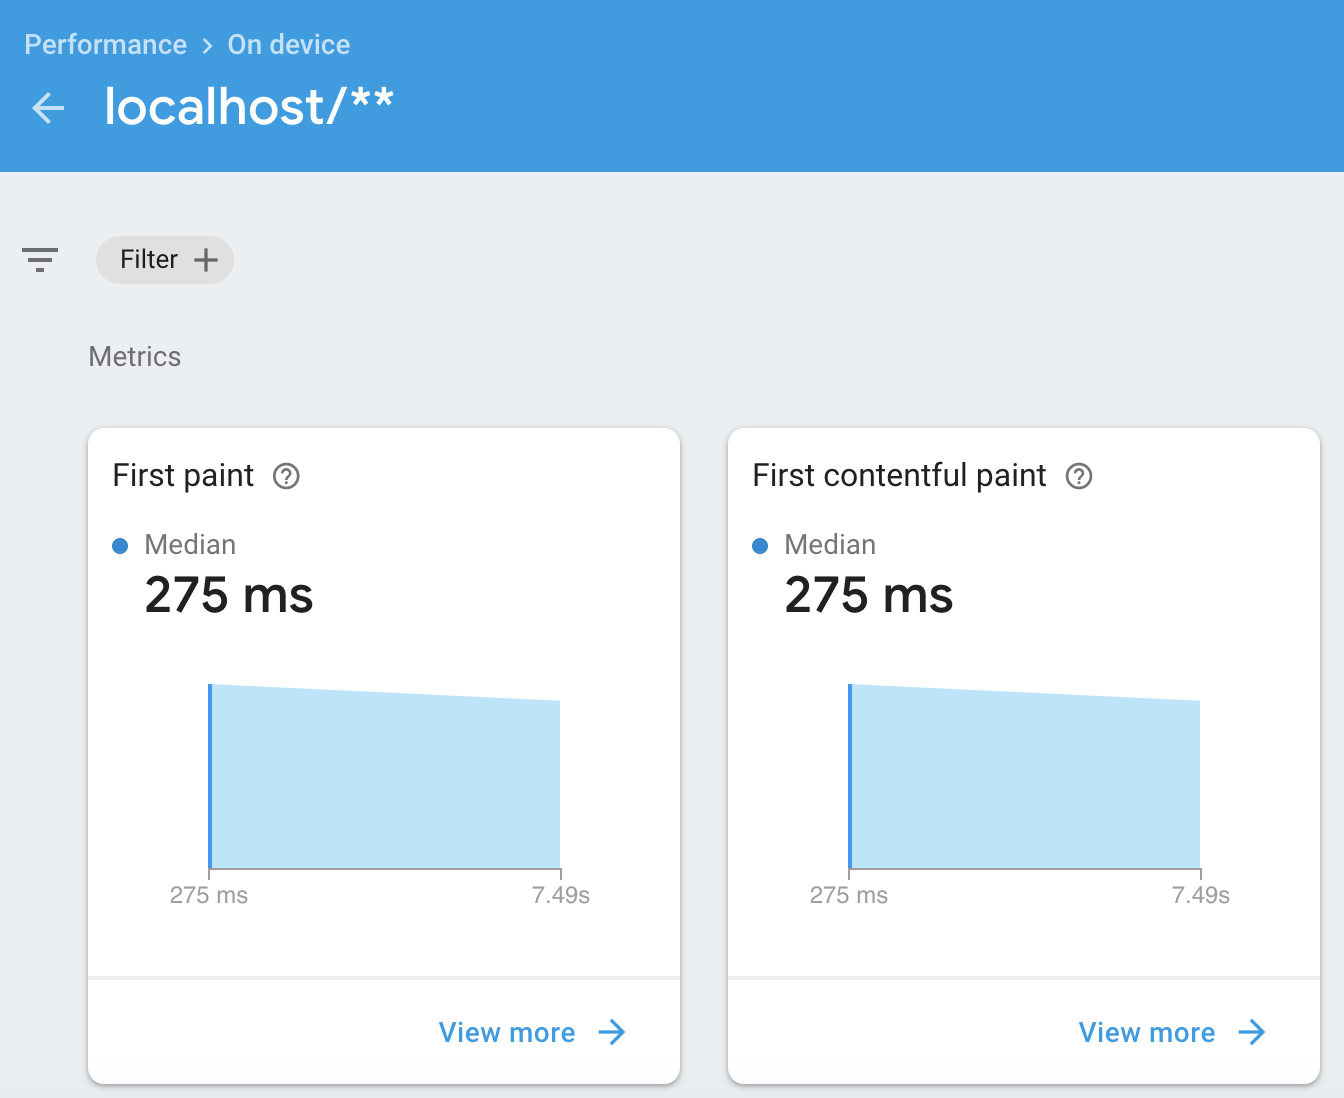
Note that Firebase Performance Monitoring can take about 12 hours to crunch your data and show it in the _Performance_ tab of the Firebase console.
This is an example of some of the stats in the Firebase Performance Monitoring console after 12 hours:
## _Next Steps_
To explore information on using ReactFire, check out [Common Use Cases](https://github.com/FirebaseExtended/reactfire/blob/master/docs/use.md).